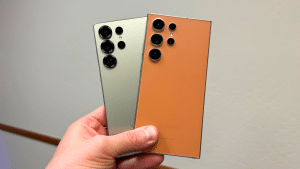
Best Camera Settings for Galaxy S & Z Series (Samsung Should Make Them Default)

SammyGuru is reader-supported. We have affiliate and sponsored partnerships, so we may earn a commission when you buy through links on our site — at no extra cost to you. Learn more.
Samsung’s default camera philosophy prioritizes speed, safety, and file size, not maximum image quality. Out of the box, many of the phone’s best camera behaviors are either disabled, buried in menus, or tuned conservatively to avoid mistakes rather than to extract the best possible image. A bit of tuning, and the photos look a lot better.
However, not everyone is a photography expert. It’s difficult to figure out the exact settings that one should tweak to improve the camera quality of their Galaxy phone. To help out SammyGuru readers, I have curated some custom camera settings that consistently deliver the best balance of detail, motion capture, color accuracy, and stability. I figured these settings after extensive real-world shooting across Galaxy devices, and honestly, Samsung should ship them as the default.
Disclaimer: Results may vary depending on your specific Galaxy model or One UI version. These settings are tested to work exceptionally well on Galaxy S & Z series devices released in 2025 and running One UI 8.
Main camera settings for photos
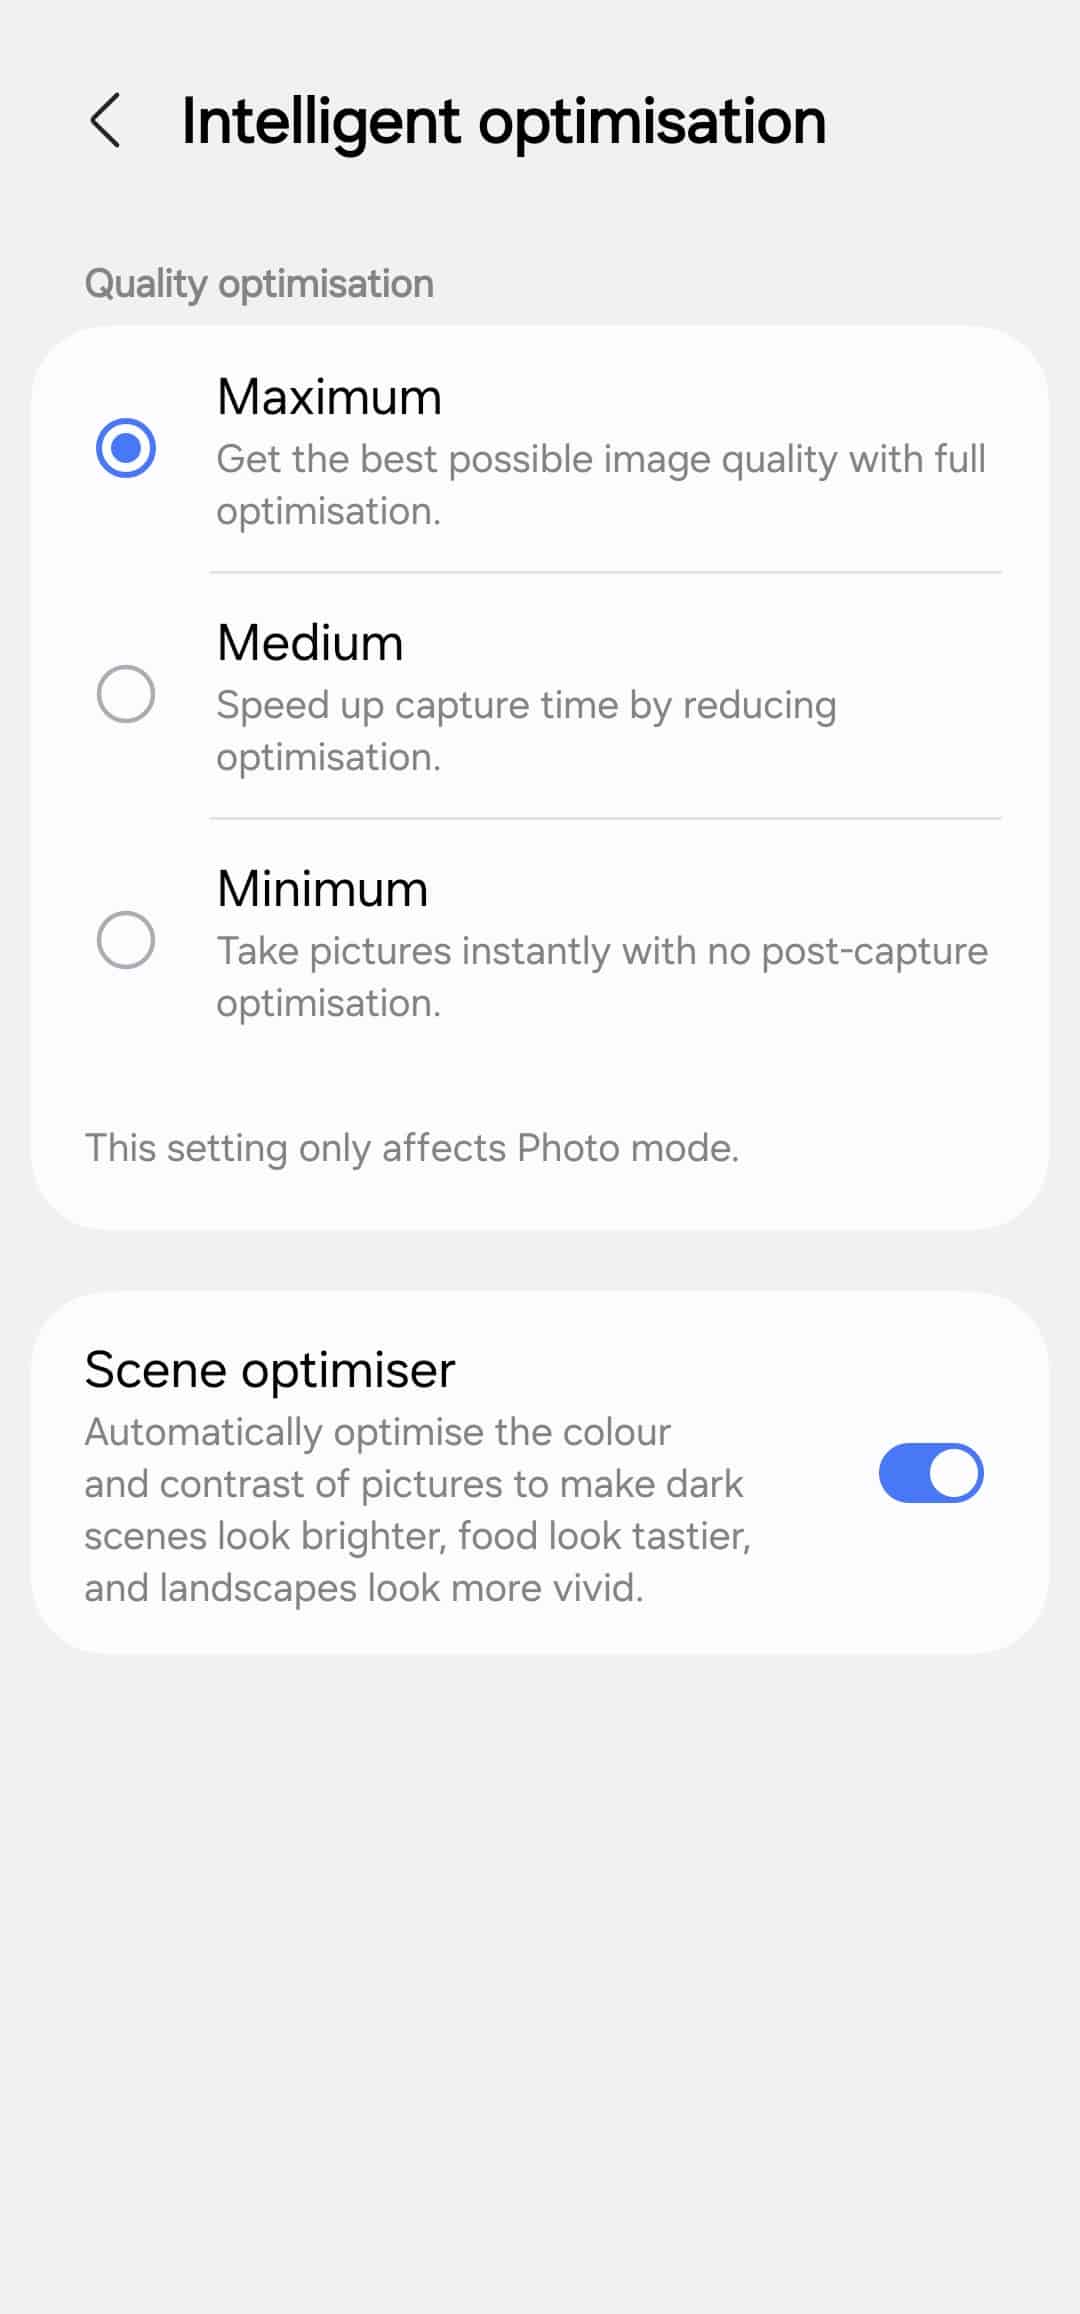
Turn Scene Optimizer ON and leave Max Quality enabled: Scene Optimizer is already tuned conservatively and helps with better scene recognition, contrast handling, and HDR consistency, especially in mixed lighting. It improves output far more often than it harms it. Go to camera settings > Intelligent optimization > select Maximum (keep Scene optimizer ON).
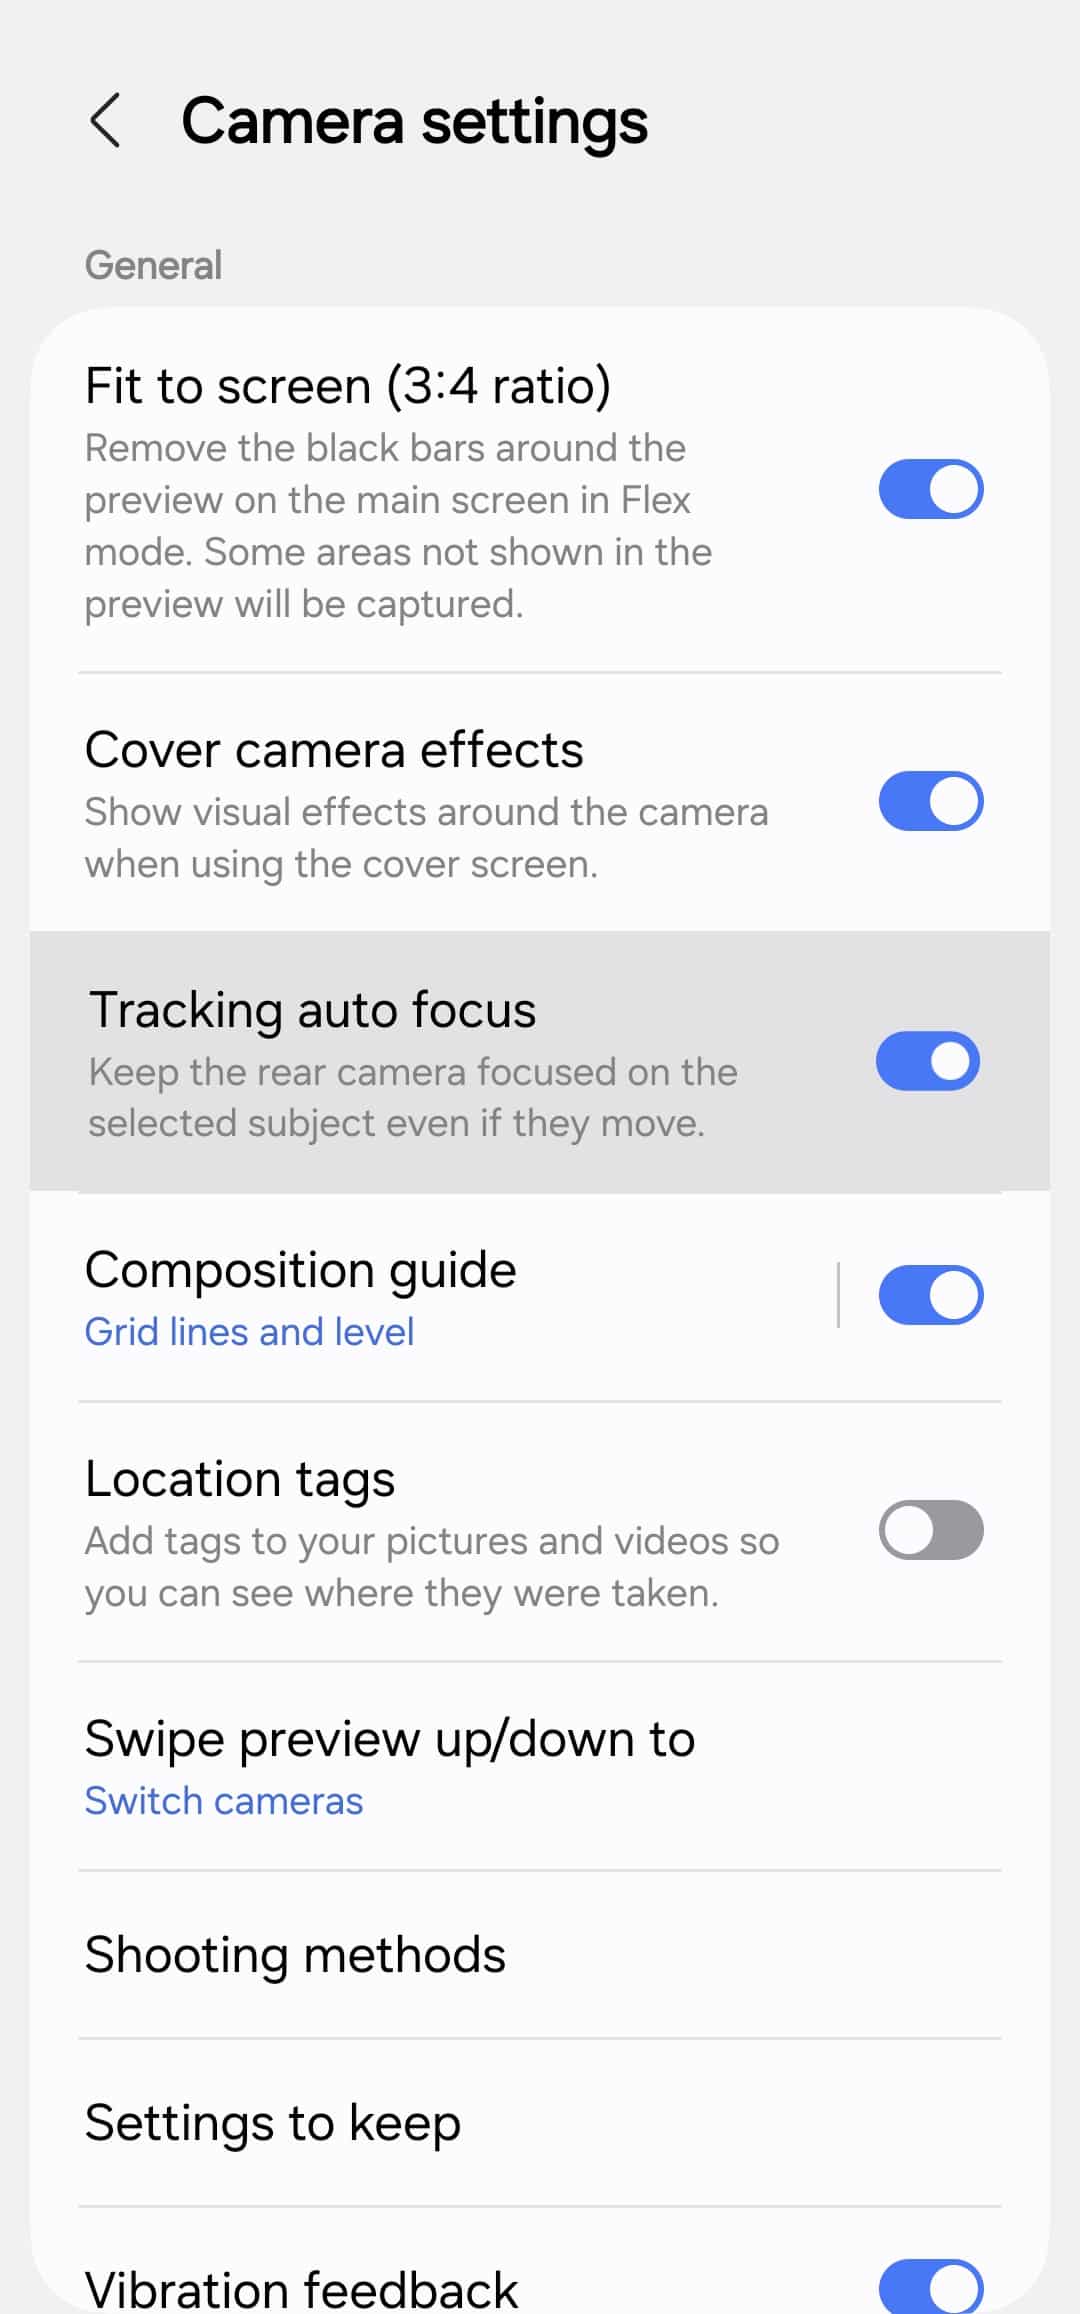
Enable Tracking Autofocus: Samsung’s autofocus system is fast, and tracking dramatically improves hit rate for people, pets, and moving subjects. Go to camera settings and enable Tacking autofocus.
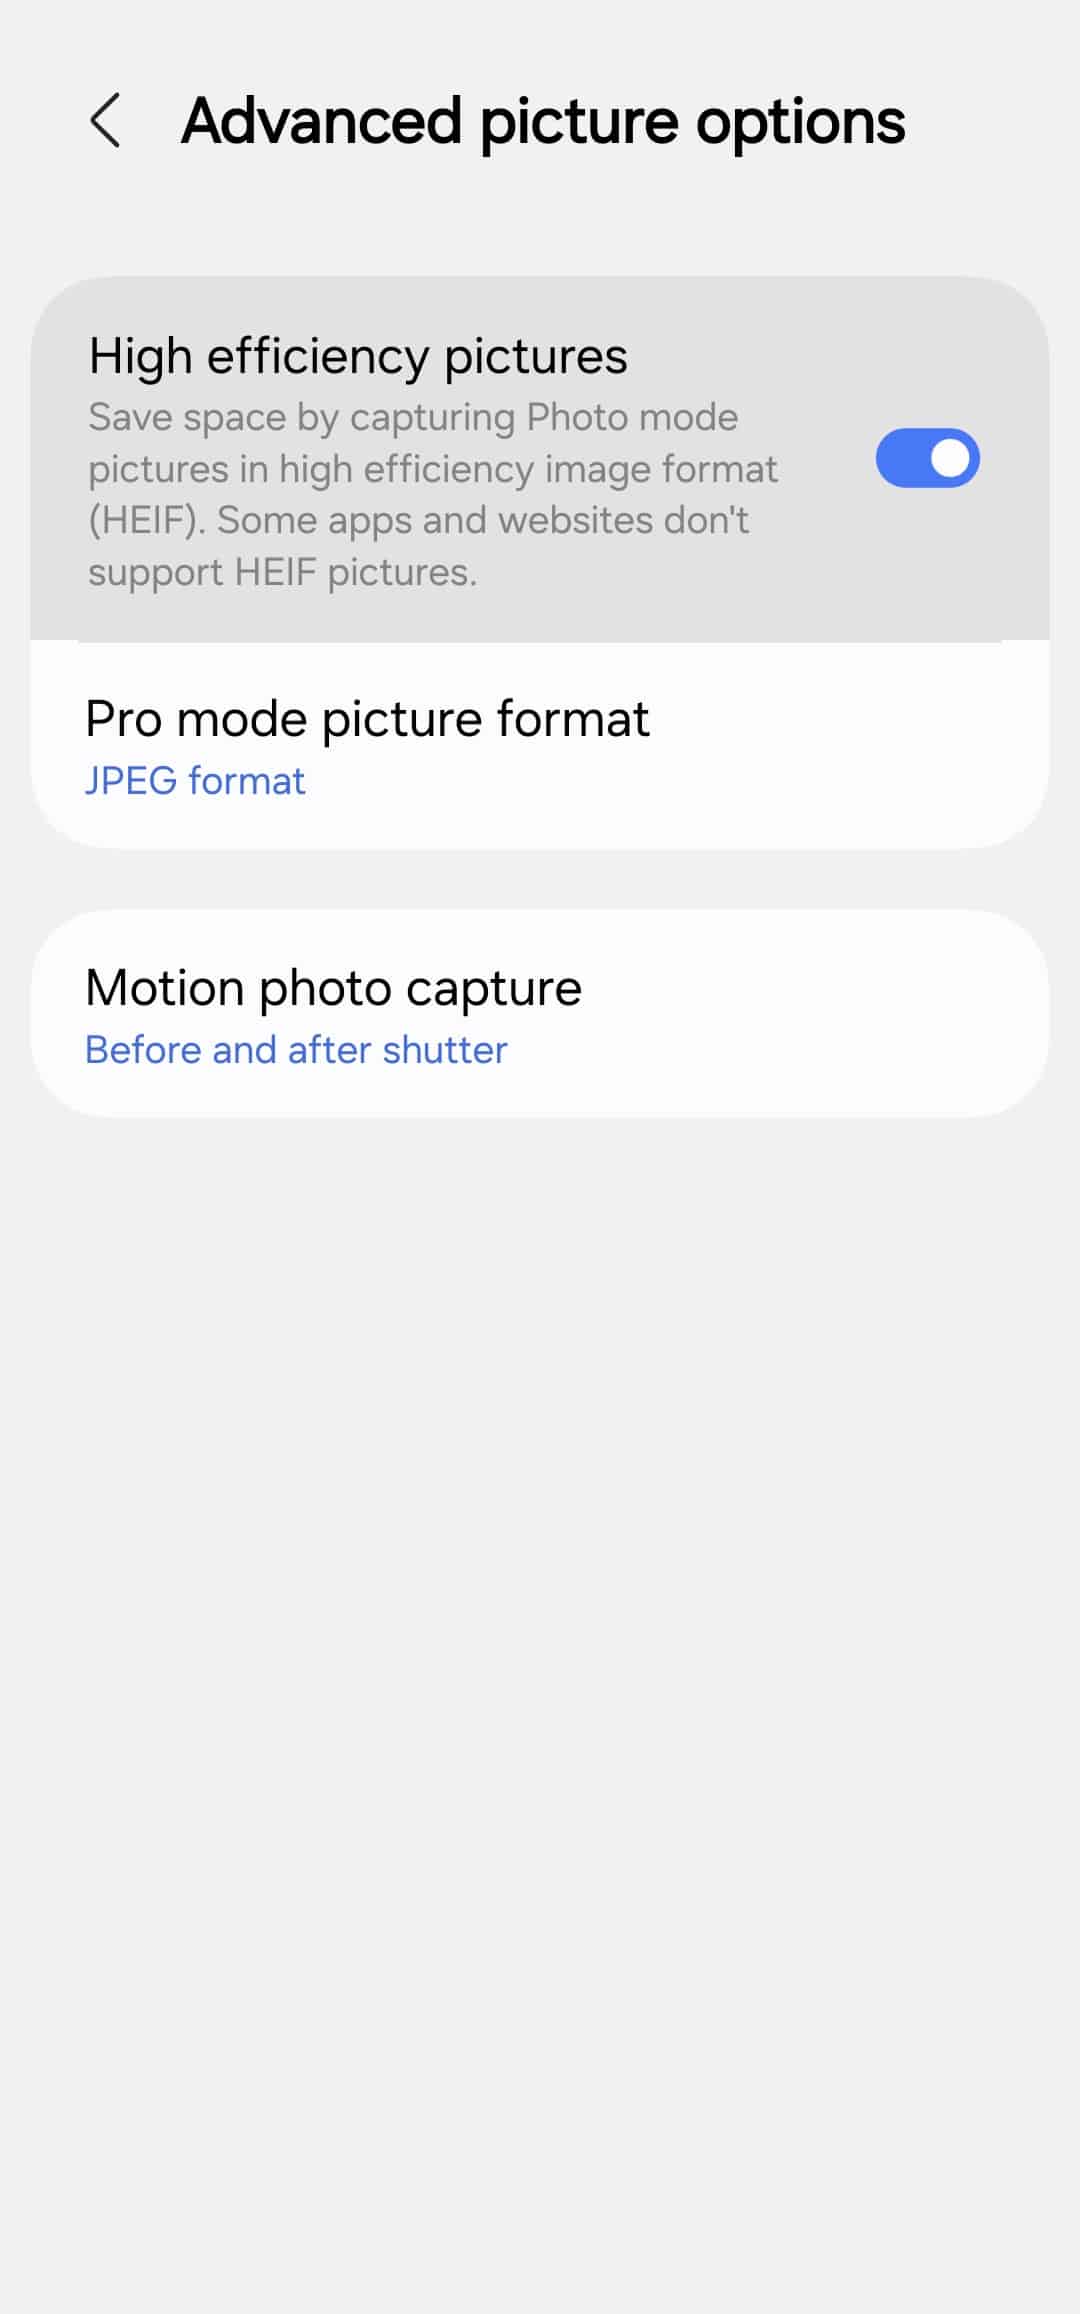
Switch image format to HEIF: HEIF is 10-bit, preserves more color information, and grades far better than JPEG, especially in skies and skin tones. It also saves storage space, and with one tap in the Gallery, you can convert to JPEG for apps or websites that don’t support HEIF pictures. Go to camera settings > Advanced picture options > enable High efficiency pictures.
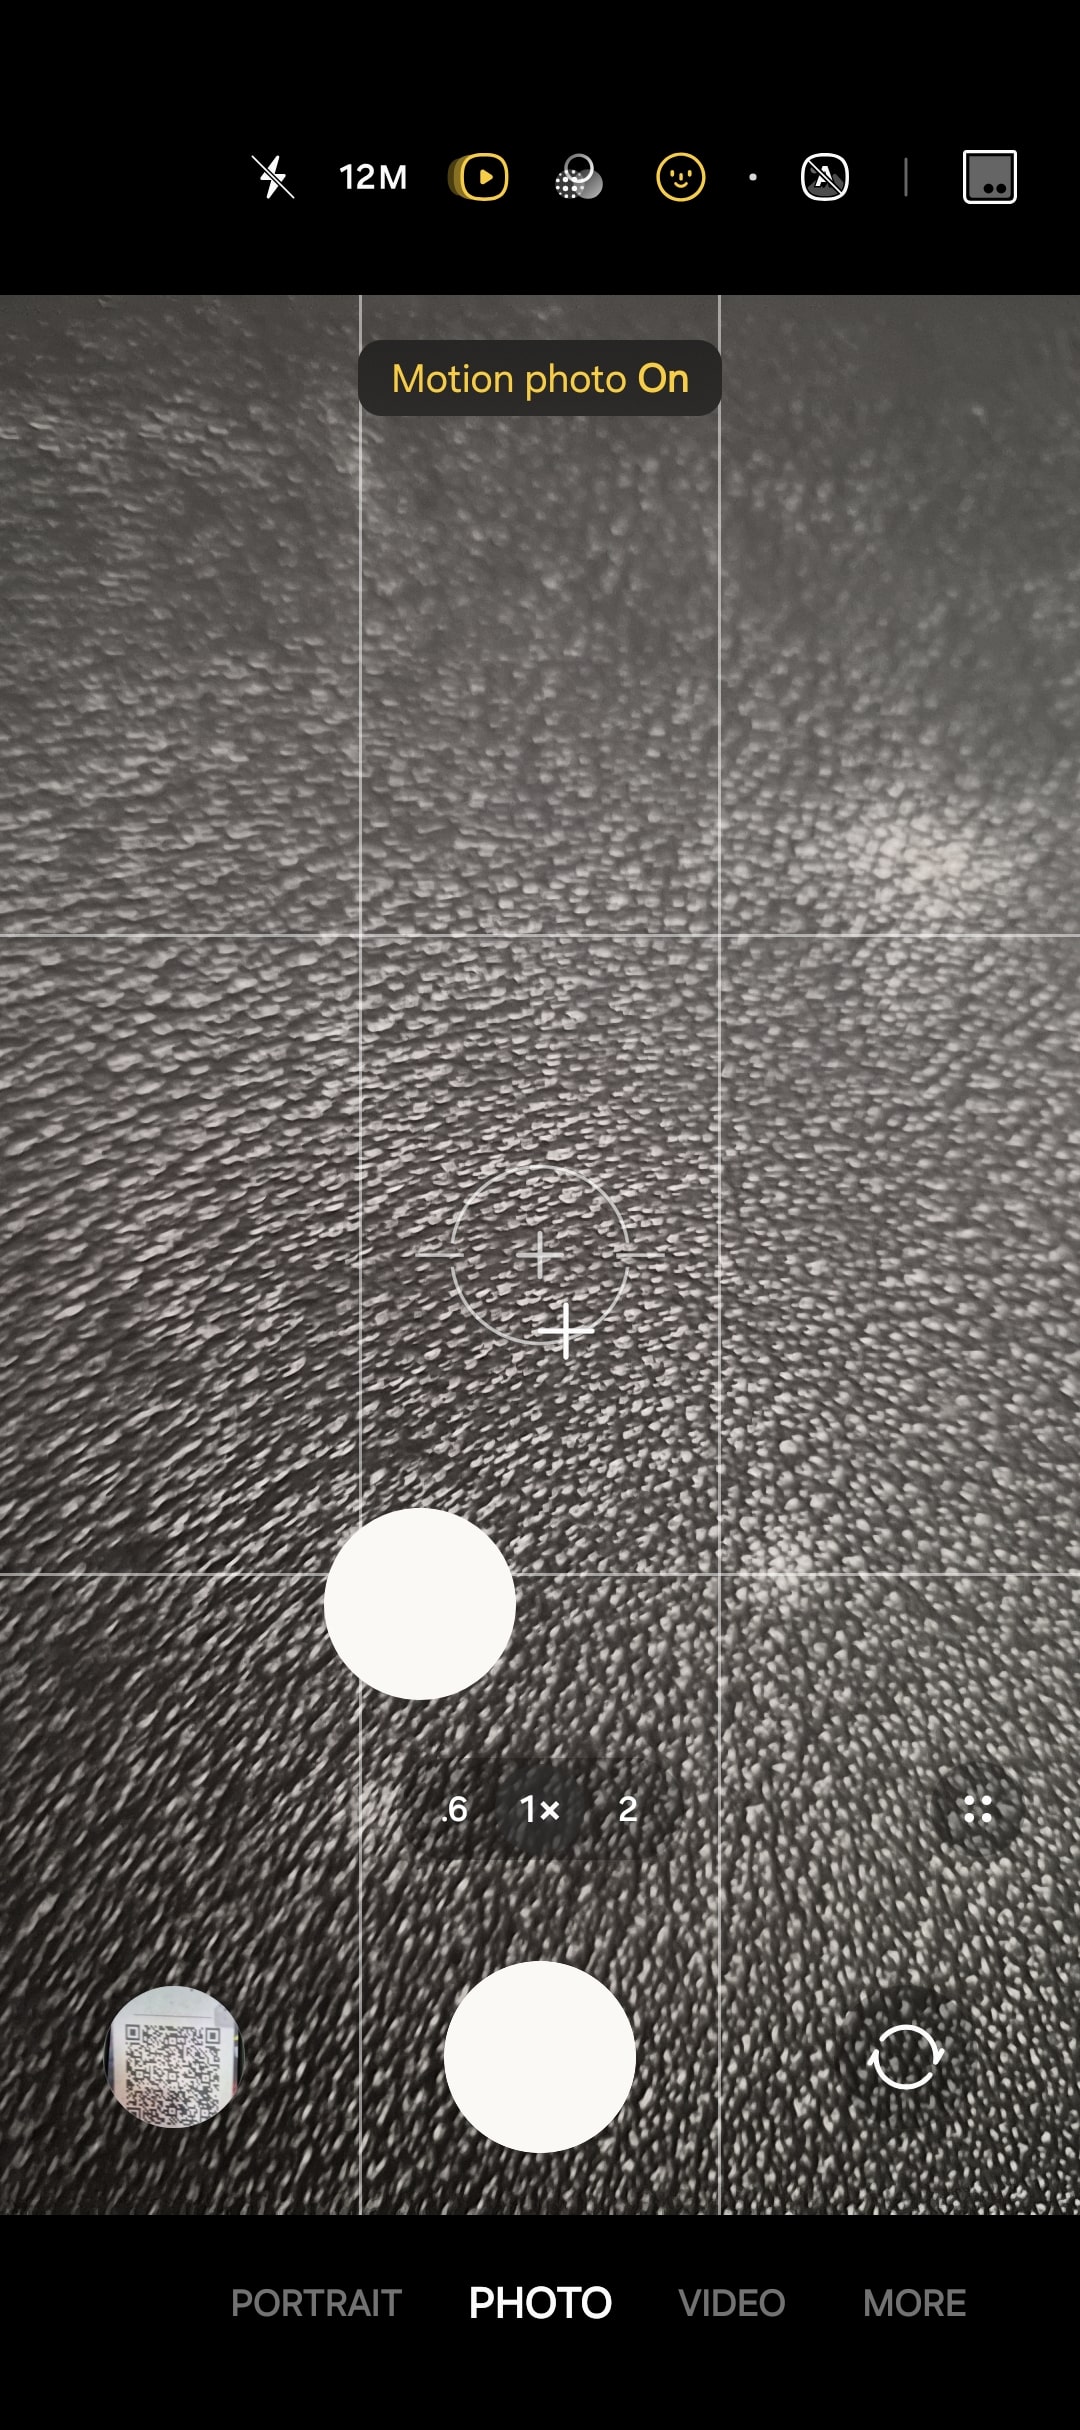
Enable Motion Photo: Samsung captures frames before the shutter press, which is real insurance for unpredictable action if you shoot fast moments. File size will be slightly larger, but the payoff is worth it. Motion Photo has a Play button-shaped toggle in the camera viewfinder.
Main camera settings for videos
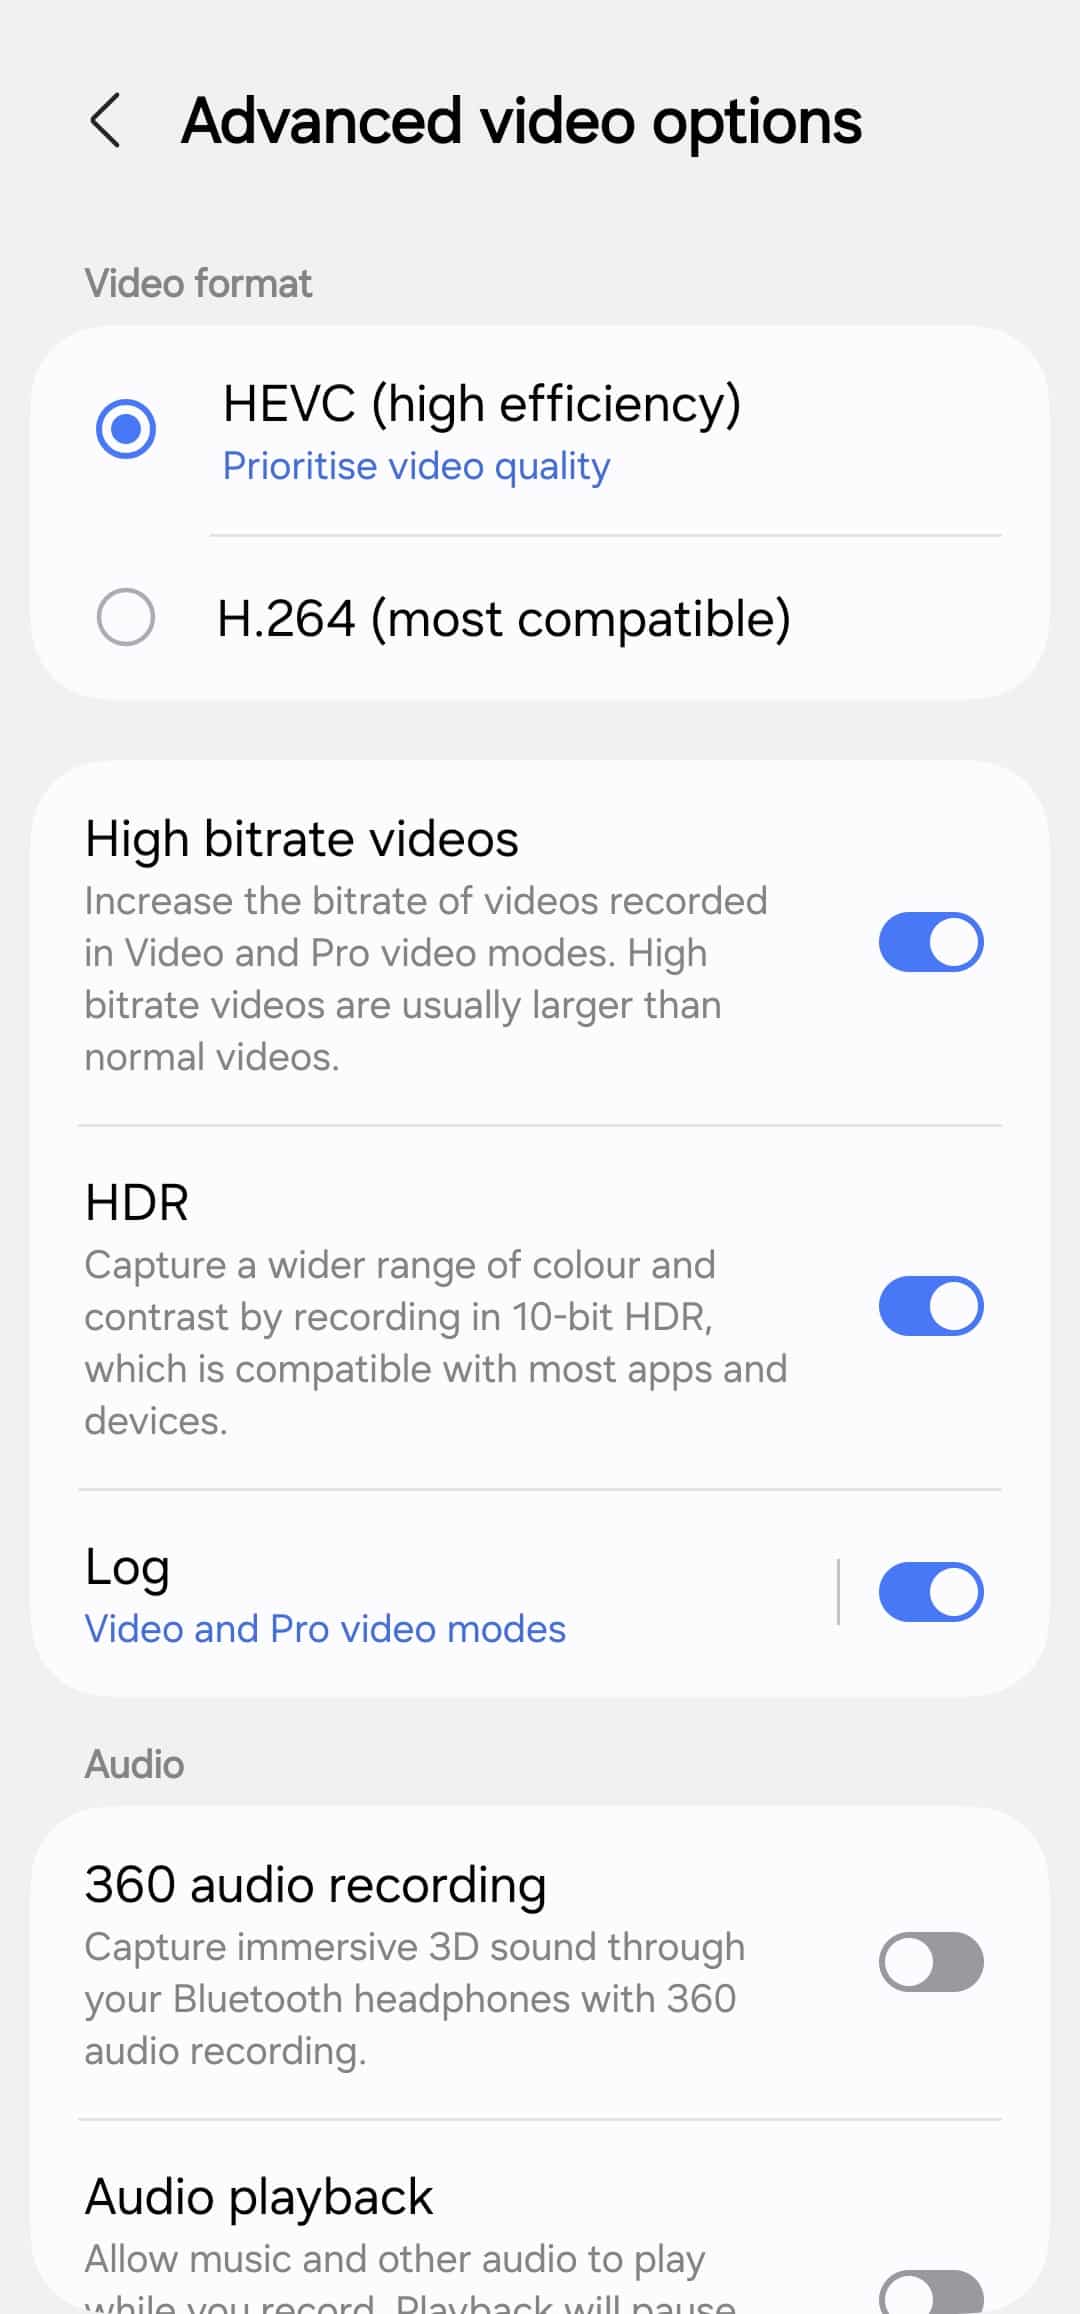
For videos, keep HEVC as the default format, enable High Bitrate, and activate Log Video. High Bitrate is essential for quality because it preserves more of the ISP and NPU’s processed output, reducing compression artifacts and maintaining smoother highlights and color transitions, while log gives more dynamic range and flexible color grading. You can find all of these settings under Advanced video options in camera settings.
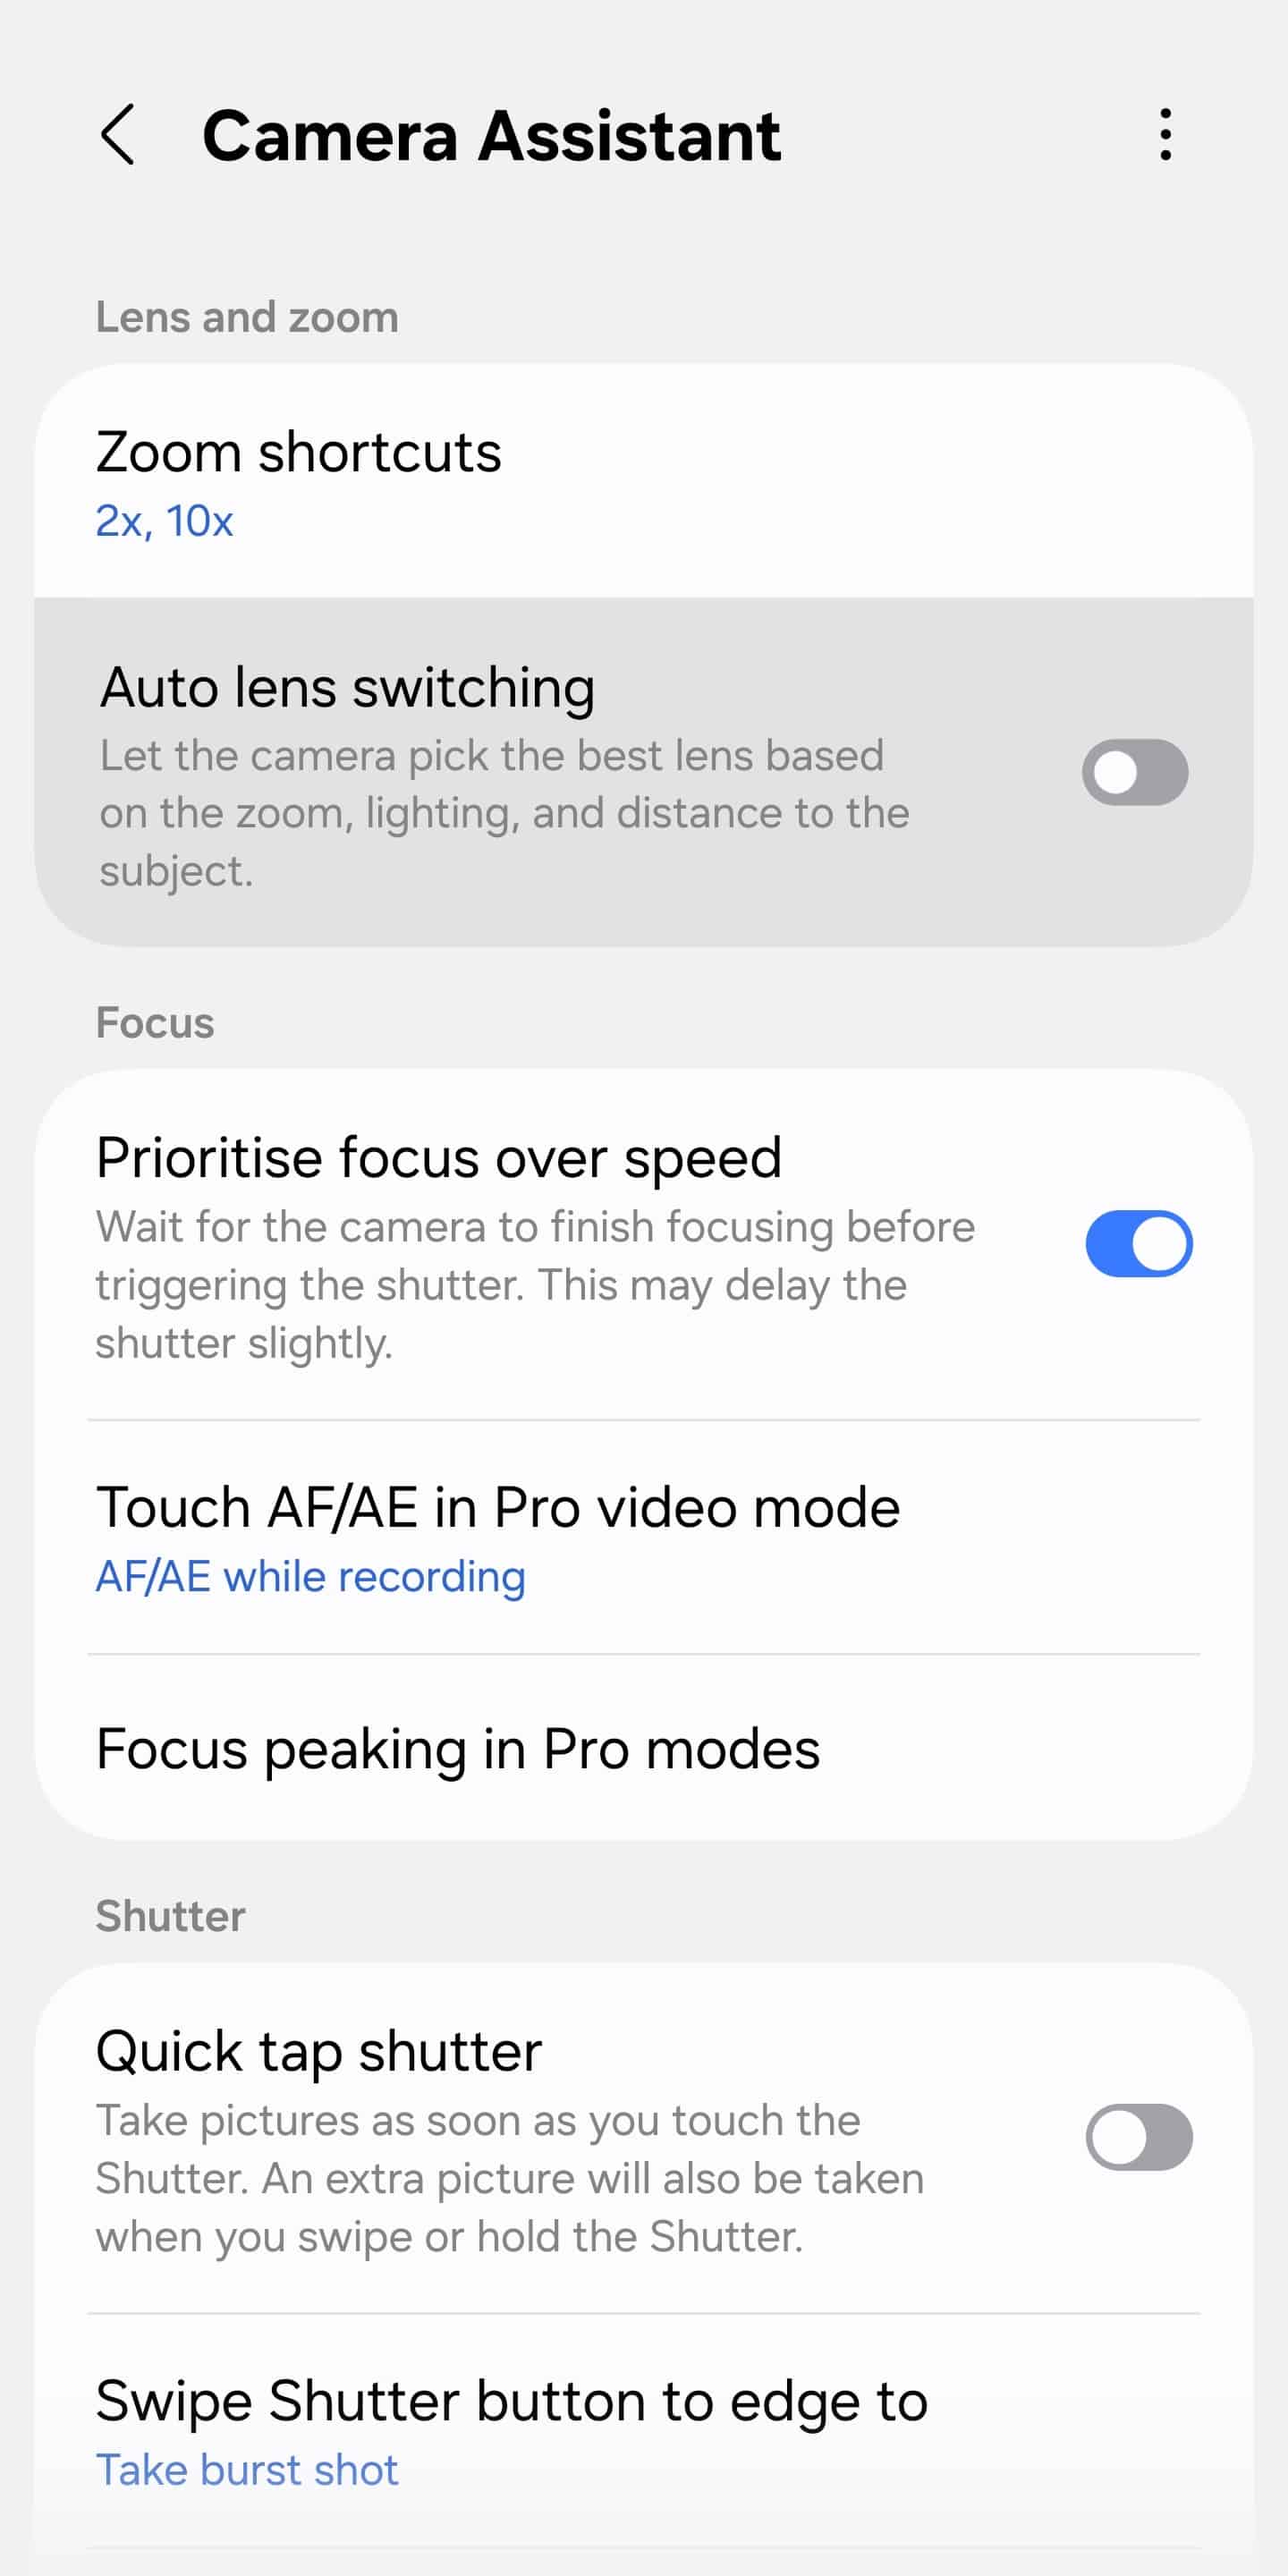
Camera Assistant is where the real gains are
Camera Assistant is a Samsung app you can download from the Galaxy Store. This is where Samsung hides the good stuff.
Turn Auto lens switching OFF: Automatic lens switching breaks consistency and can silently downgrade image quality.
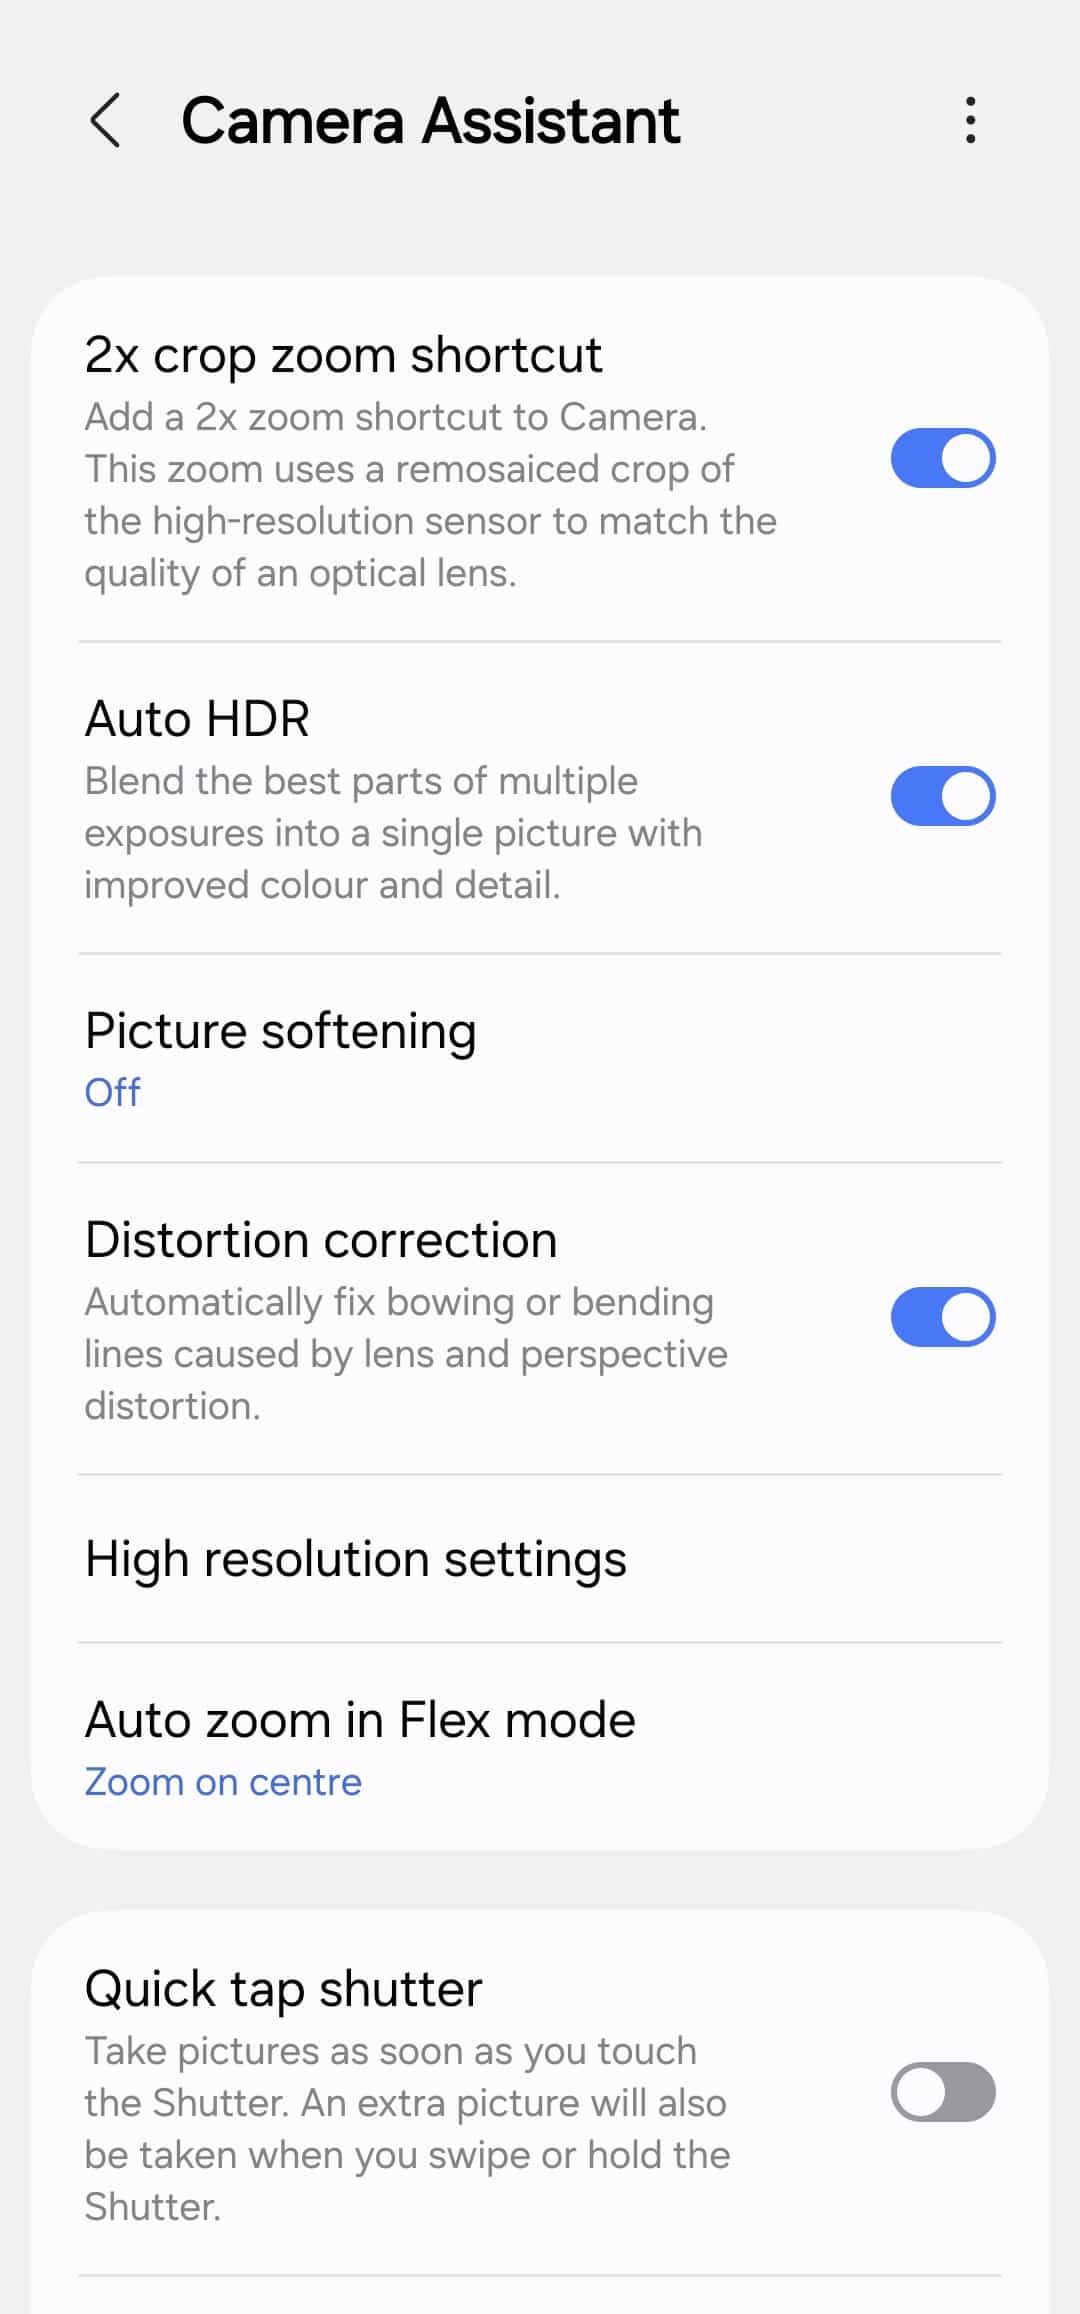
Keep Distortion Correction ON: Especially important for ultra-wide shots.
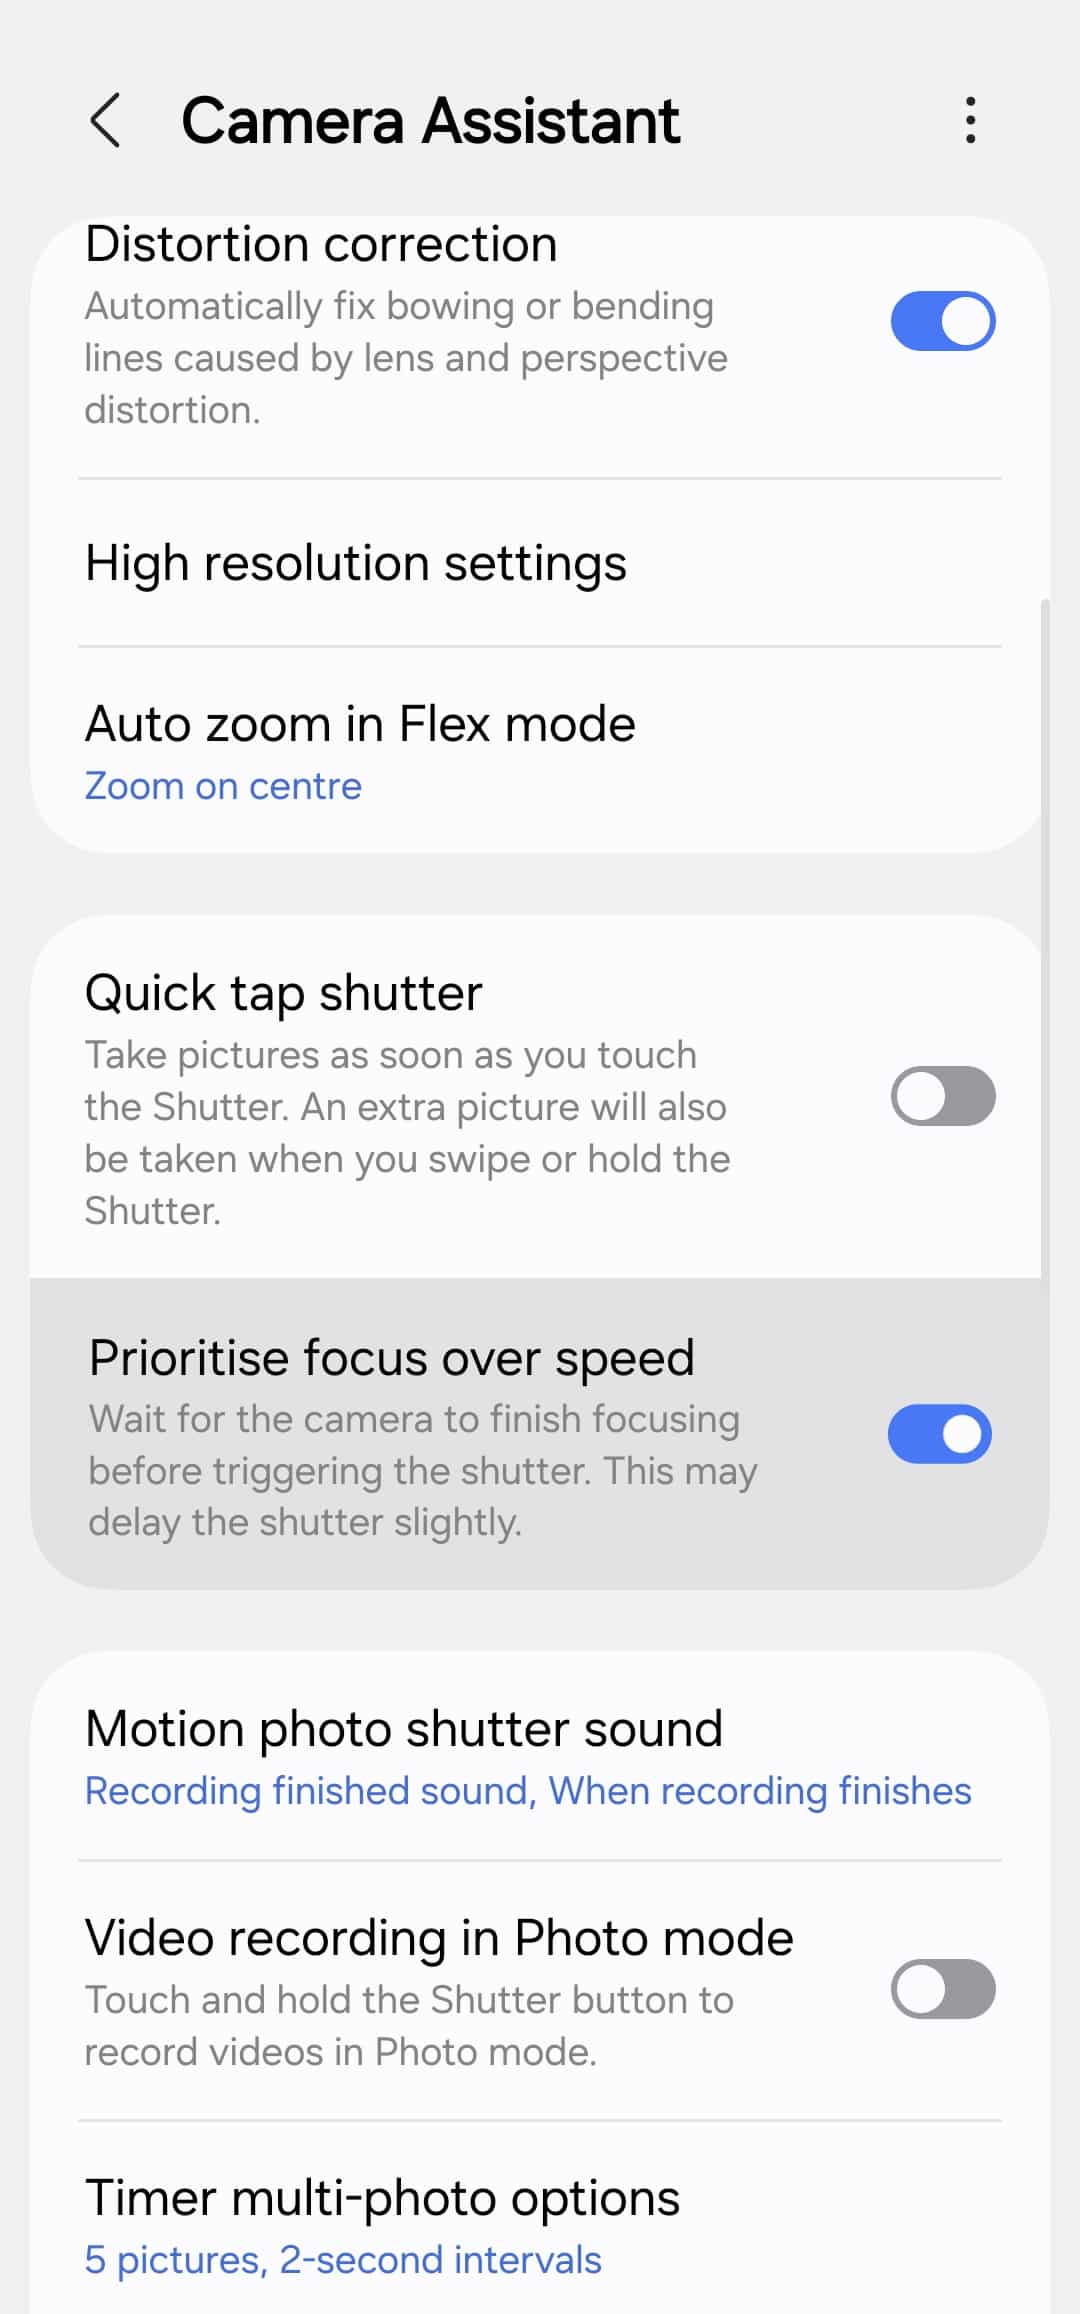
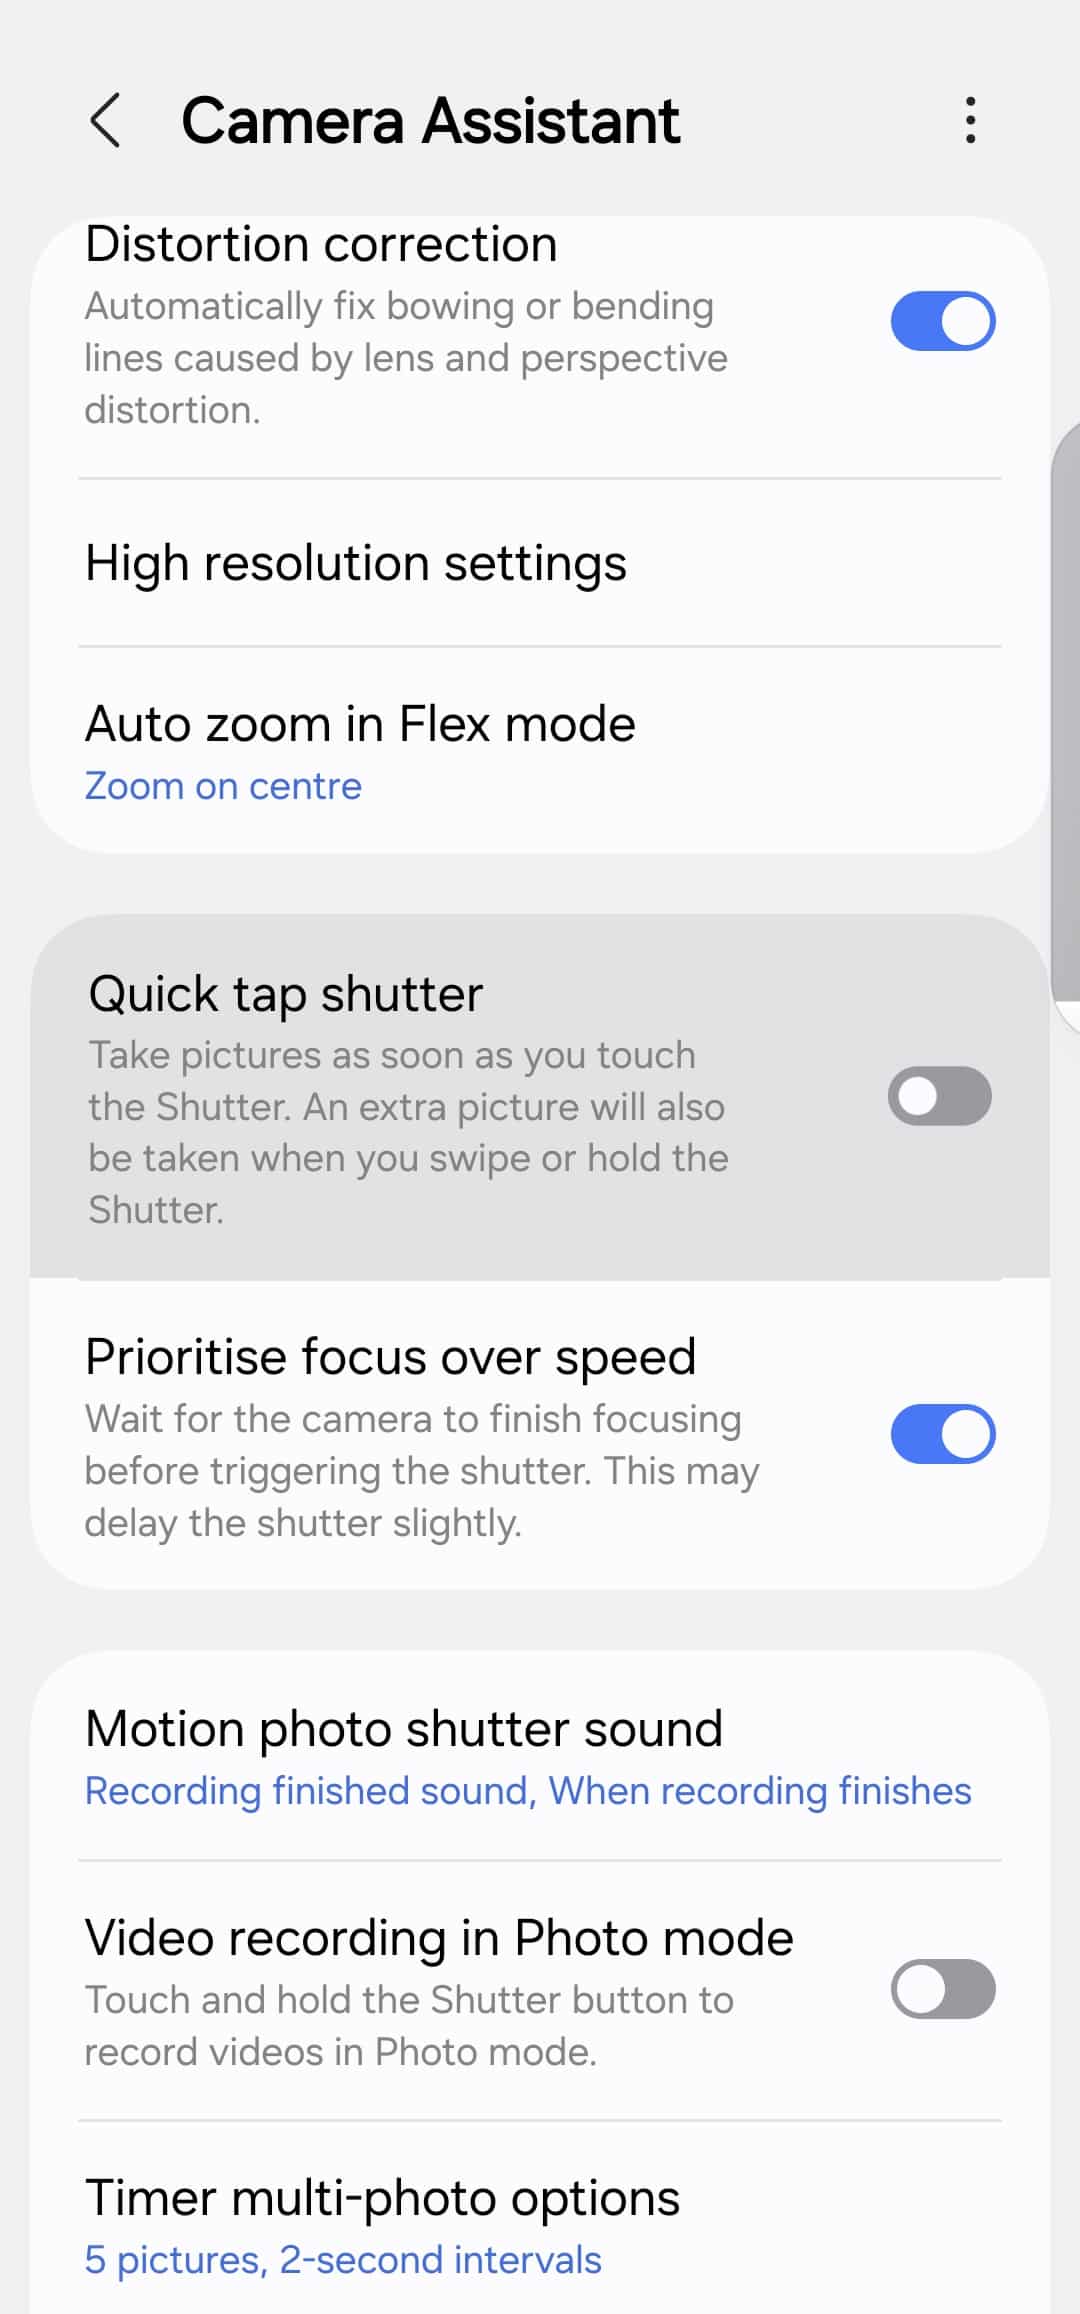
Set Prioritize Focus Over Speed: After extensive testing, this does not negatively impact shutter speed or Motion Photo — it simply delivers more reliable focus.
Keep Quick Tap Shutter OFF: Let the camera finish focusing. In most scenarios, results are noticeably better.
Enable HDR10+ Video: Standard HDR works well, but HDR10+ is cleaner, crisper, and better controlled. Samsung’s HDR pipeline is strong, so use it.
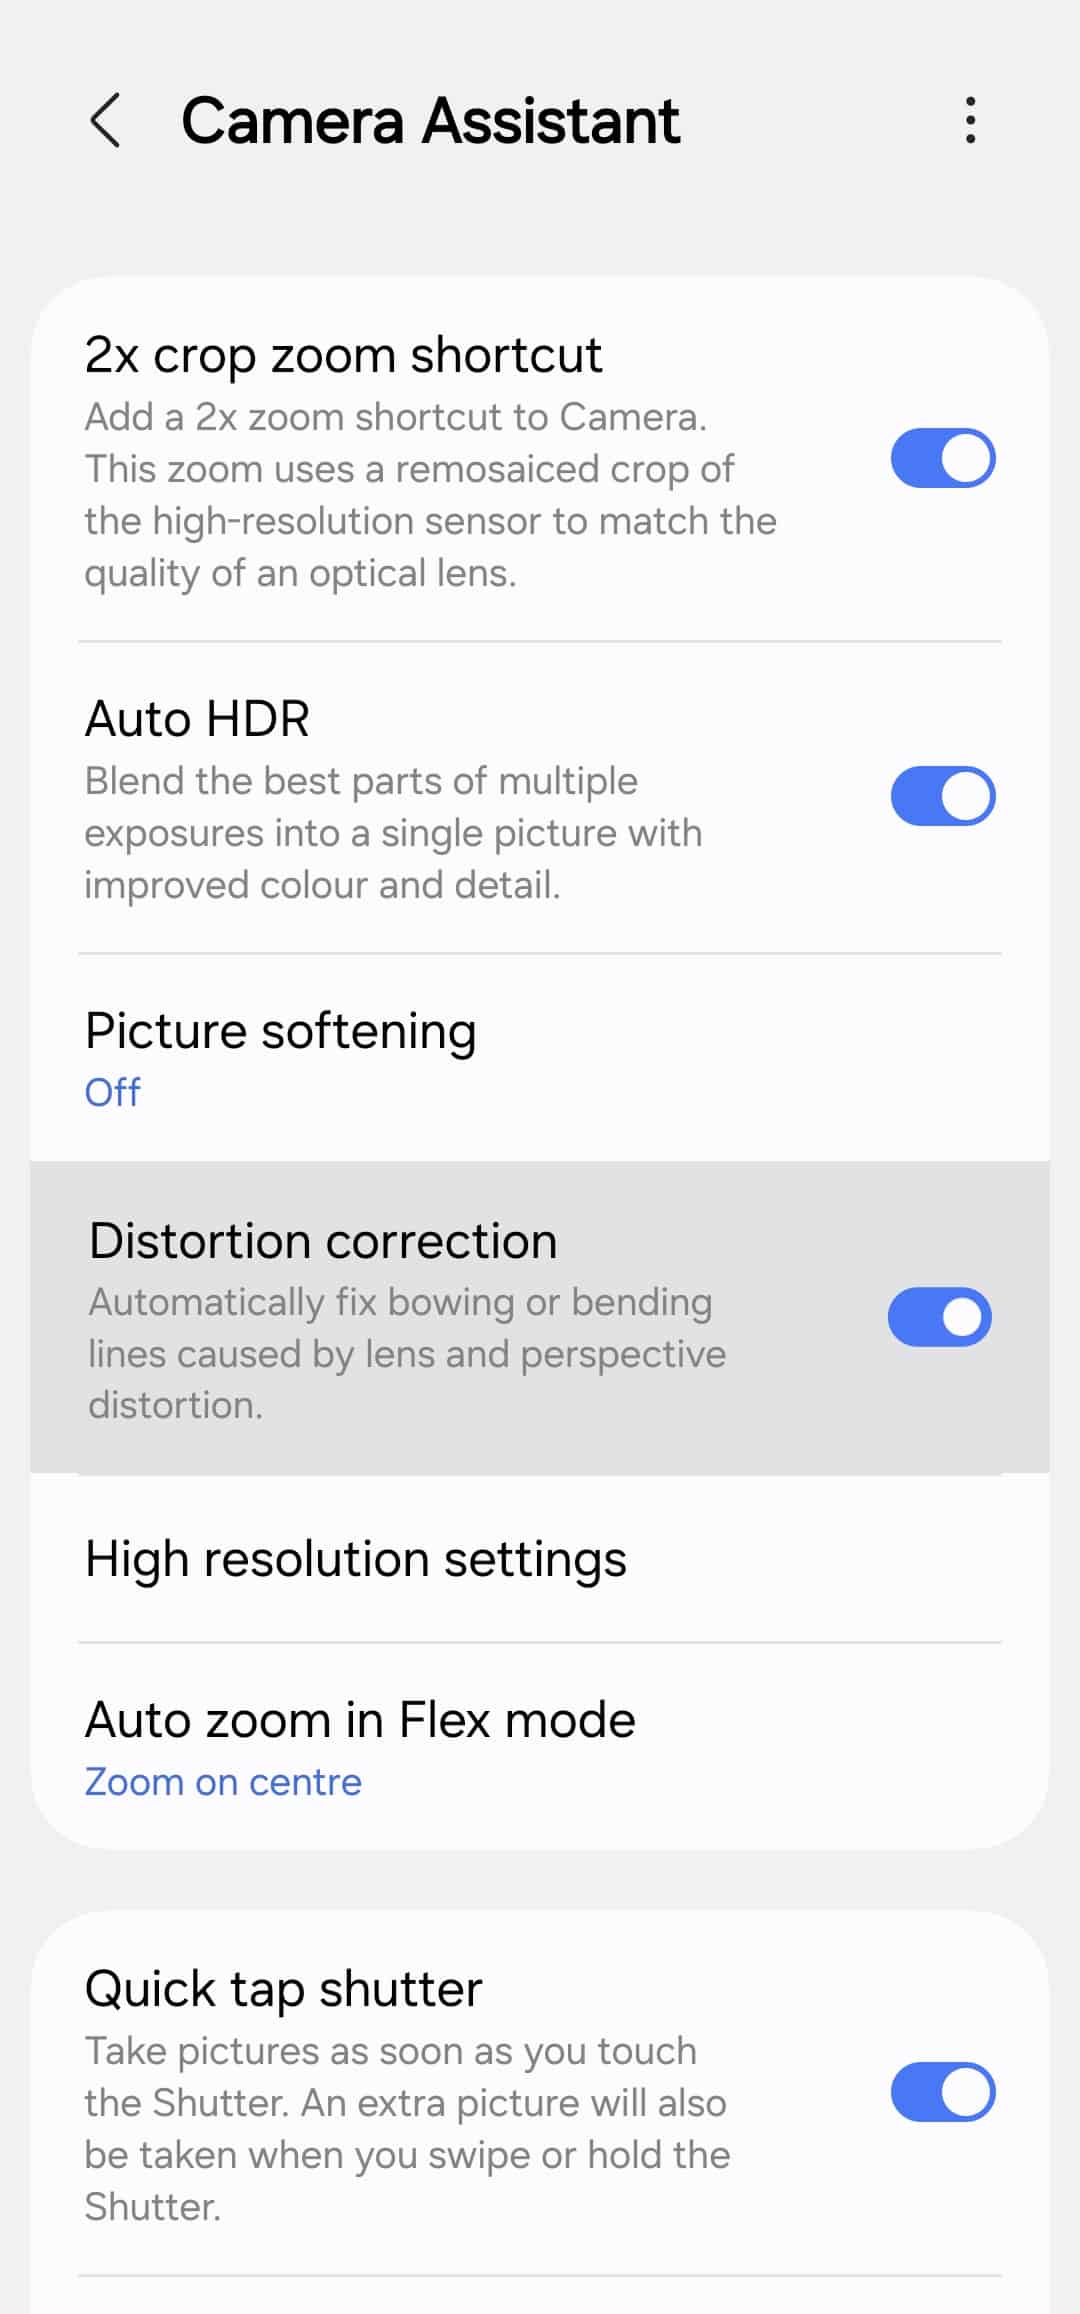
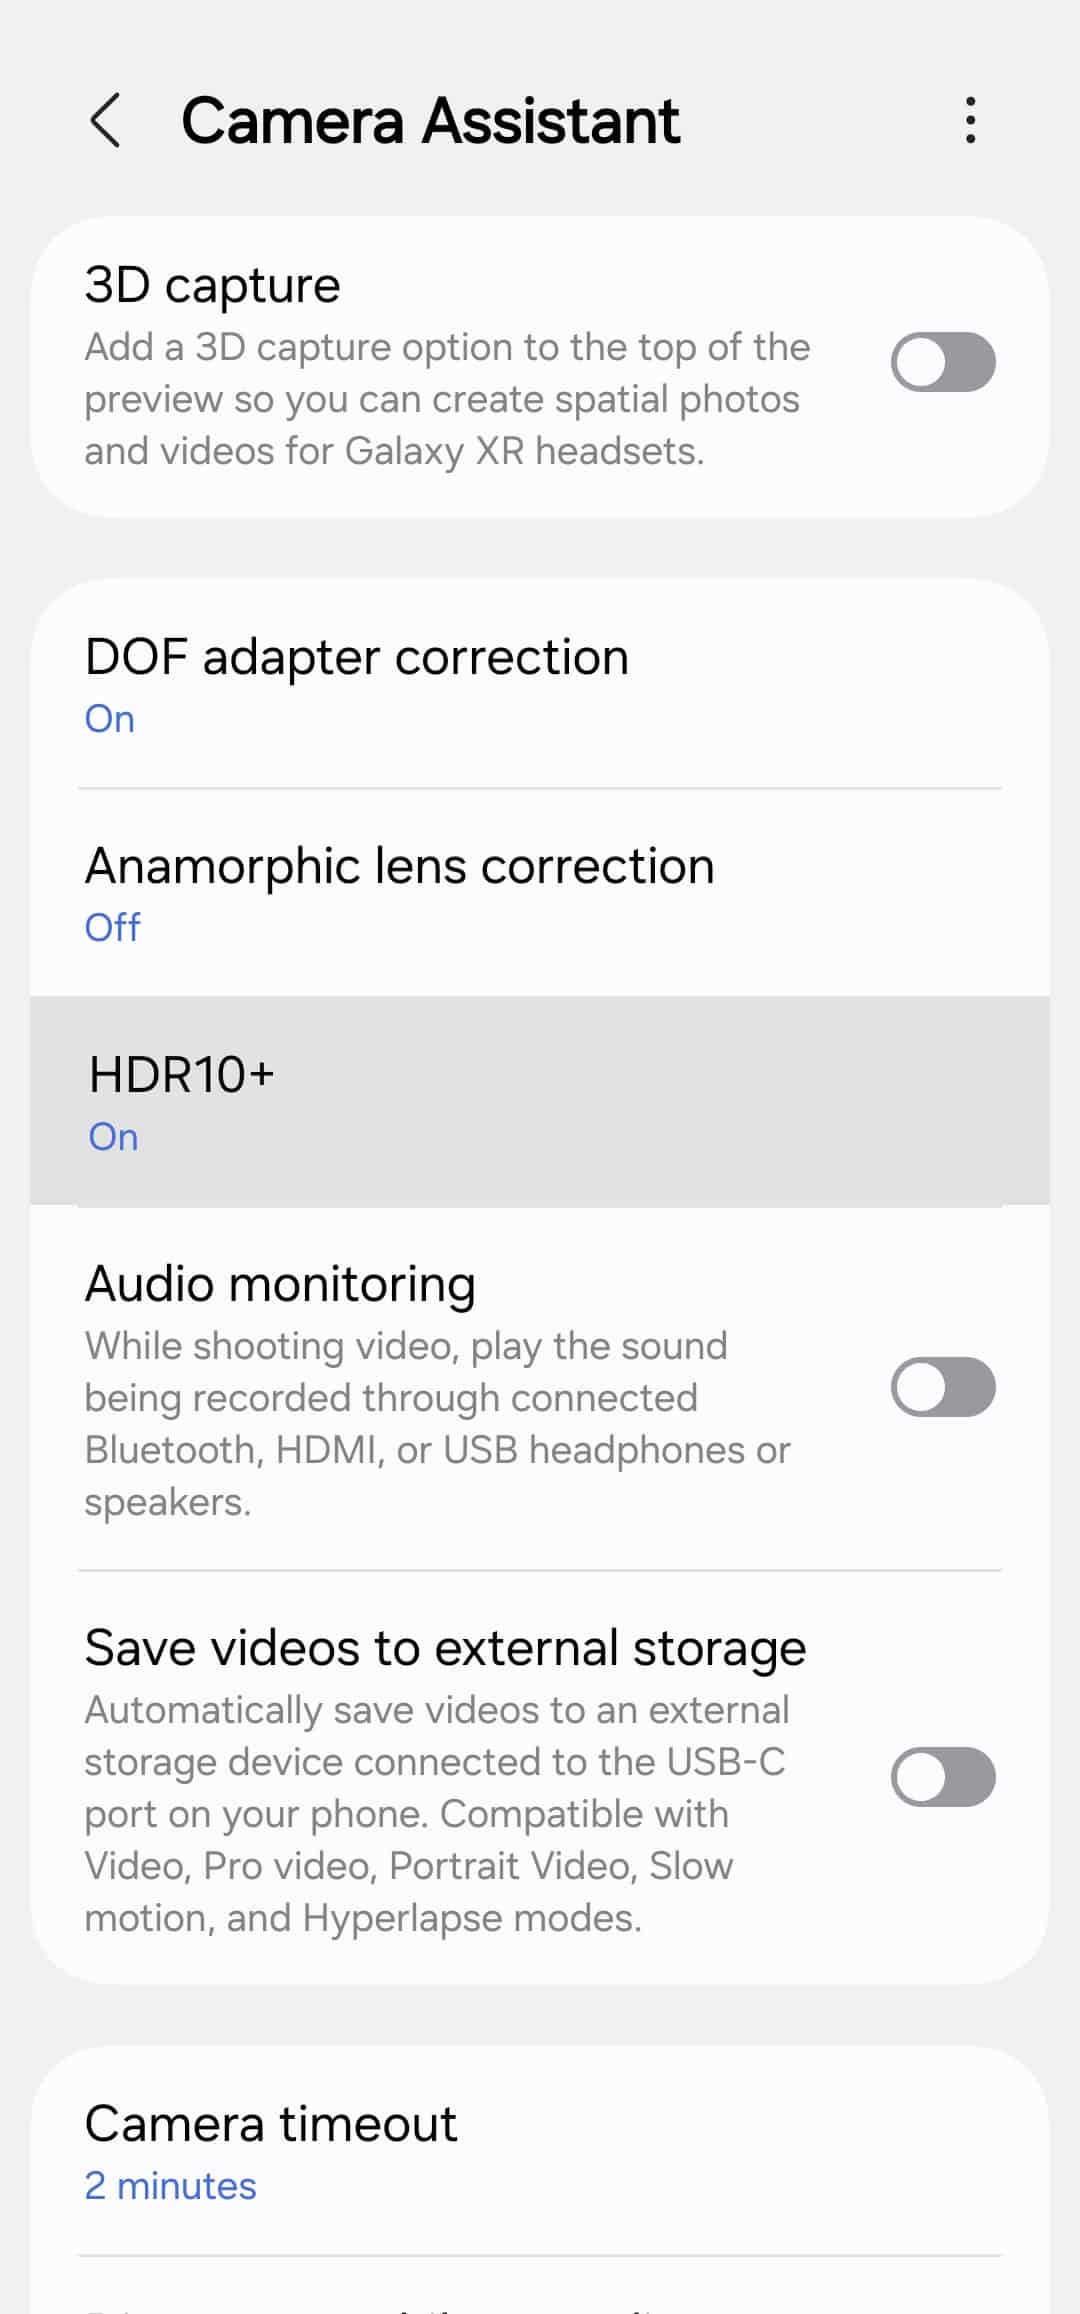
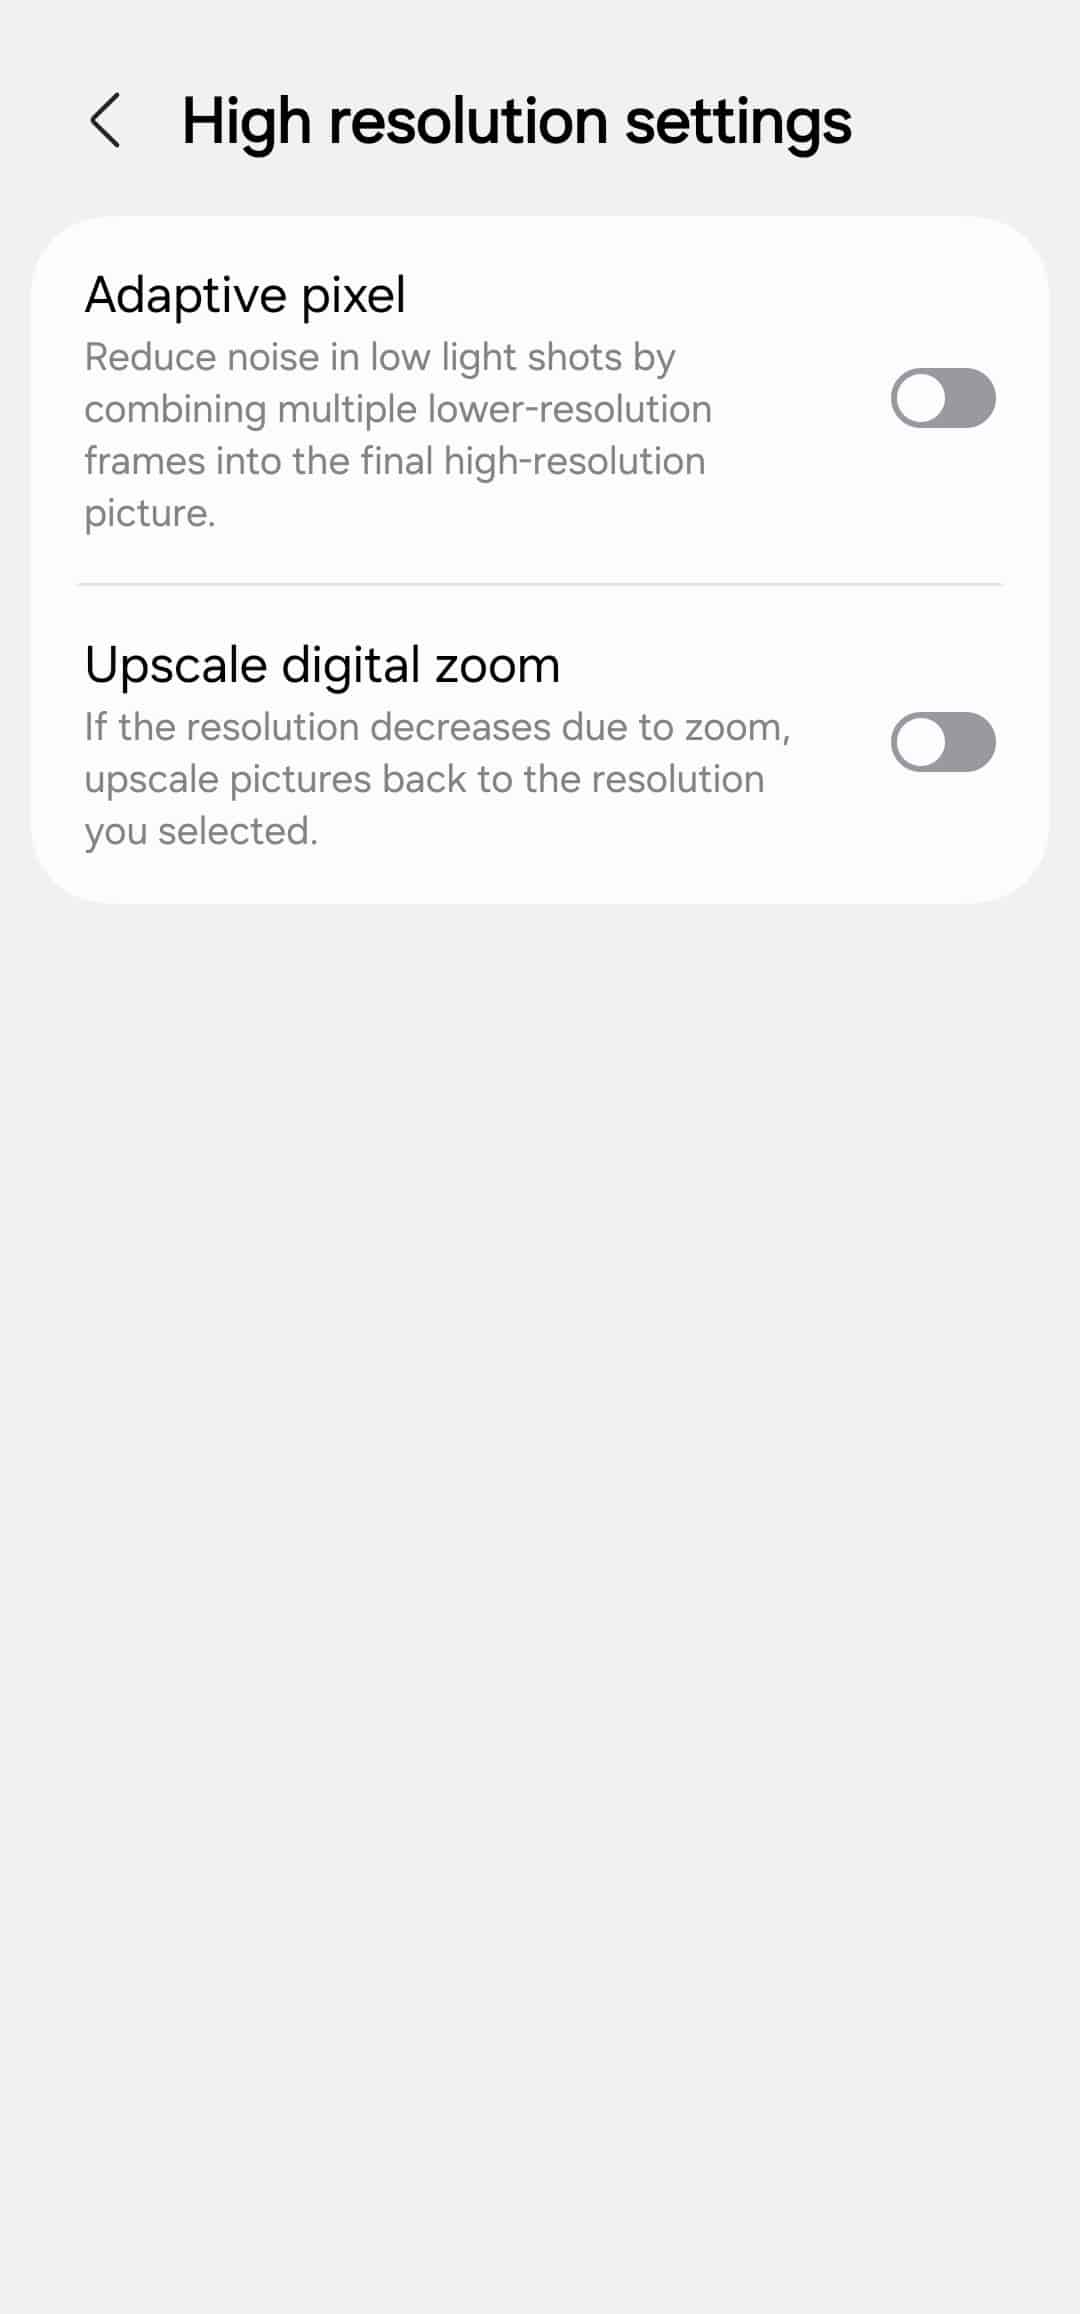
Turn Adaptive Pixel OFF & Turn Upscale Zoom OFF: These two settings alone remove a surprising amount of artificial texture (available under High resolution settings). 200MP works best as a single-frame capture. Adaptive Pixel adds unnecessary processing. In many cases, 50MP delivers results very close to 200MP with Adaptive Pixel ON, so if you’re using 200MP, use it at its full, clean potential. For low light, stick to 50MP with Adaptive Pixel OFF if you want higher resolution, or 12MP for the most balanced night results.
Leave Auto HDR ON and Picture Softening OFF: There is no aggressive oversharpening by default on the Galaxy S25 Ultra or Galaxy Z Fold / Flip 7. If you experience oversharpening during digital zoom on older devices, set Softening to Medium.
How to shoot: Auto Mode (use the right resolution per lens)
Ultra-Wide (0.6x)
- 50MP → Maximum detail, slightly softer
- 12MP → Sharper look, better highlight control, better for macro
Choose based on distance and lighting, not habit.
Main Camera (1x)
- 200MP, Adaptive Pixel OFF → Daylight, static scenes, fireworks, trust your viewfinder
- 50MP, Adaptive Pixel OFF → Balanced quality
- 12MP → Low light or fast motion
Telephoto
- 3x → 50MP (outputs ~13MP, better texture than 12MP)
- 5x & 10x → 12MP for stability and consistency
Avoid high-resolution modes here.
Macro
Triggered from 1x, always 12MP. This is normal and optimal.
These settings reduce over-processing, improve motion capture, preserve micro-contrast, and let Samsung’s sensor, ISP, and NPU work together naturally. Samsung should consider making these settings available by default on all Galaxy phones as applicable. Nothing here requires new hardware. Nothing breaks simplicity. Samsung already has the right tools — it just needs the confidence to ship them properly configured.
Portrait settings and depth behavior analysis are coming next. Stay tuned.
Follow us on Google Discover & set us as a preferred source in Google News
Share this Post
___________________________


New Blog Posts
___________________________
First Set of Pixel 11 Pro XL Renders Are Here
Pixel 11 Pro XL CAD renders show minimal design changes
Is Samsung Preparing One UI 8.5 Beta for Galaxy Z Fold 5 and Flip 5?
Samsung may launch a One UI 8.5 beta program for its 2023 foldables
Galaxy S25 One UI 8.5 Beta May Run Longer Than Expected
Galaxy S25 series’ One UI 8.5 beta may stretch to 10 rounds